Hematology is a vital branch of medicine and clinical pathology concerned with the study of blood, blood-forming organs, and blood diseases. Basic hematological tests provide crucial information for diagnosing and monitoring a wide range of conditions, from infections and inflammations to anemia and leukemia.
Red Blood Cell Parameters (Hb, PCV, RBCs)
Red blood cells (RBCs), also known as erythrocytes, are responsible for transporting oxygen throughout the body using the protein hemoglobin. Evaluating RBC parameters helps assess oxygen-carrying capacity and diagnose types of anemia or polycythemia.
1. Hemoglobin (Hb) Measurement
- Purpose: To determine the concentration of hemoglobin in a given volume of blood. Hemoglobin is the protein within RBCs that binds and transports oxygen.
- Clinical Significance: Low Hb levels indicate anemia (reduced oxygen-carrying capacity). High levels may suggest polycythemia (excessive RBC production) or dehydration.
- Basic Technique (e.g., Cyanmethemoglobin Method – Principle): This is a widely used reference method.
- Blood is mixed with a solution containing potassium ferricyanide and potassium cyanide.
- Potassium ferricyanide oxidizes hemoglobin to methemoglobin.
- Potassium cyanide then reacts with methemoglobin to form stable cyanmethemoglobin.
- The intensity of the color produced is directly proportional to the concentration of hemoglobin.
- The absorbance of this solution is measured in a spectrophotometer at a specific wavelength (usually 540 nm).
- The hemoglobin concentration is determined by comparing the absorbance of the sample to that of a standard solution or using a calibration curve.
- Basic Manual Steps (Conceptual):
- Collect a precise volume of blood (e.g., using a Sahli pipette or micropipette).
- Add the blood to a much larger, precise volume of the Cyanmethemoglobin reagent in a tube.
- Mix thoroughly and allow a specific time for the reaction to complete (e.g., 5-10 minutes).
- Transfer the solution to a cuvette.
- Measure the absorbance using a spectrophotometer calibrated at 540 nm, using the reagent blank as a reference.
- Determine Hb concentration based on the spectrophotometer reading and calibration.
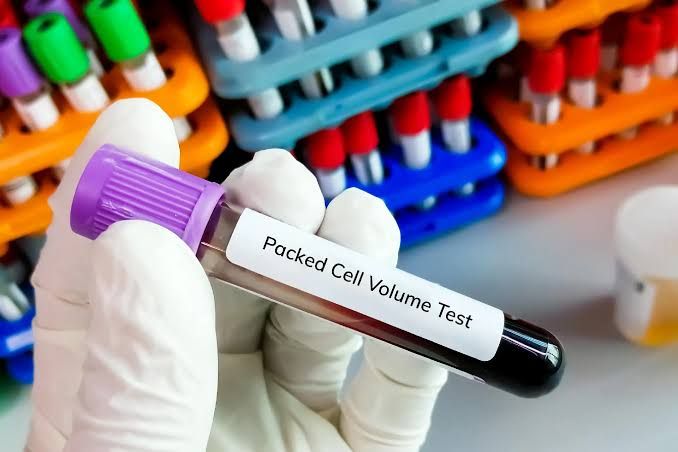
2. Packed Cell Volume (PCV) / Hematocrit (Hct)
- Purpose: To measure the percentage of the total blood volume that is composed of red blood cells.
- Clinical Significance: Low PCV indicates anemia. High PCV suggests polycythemia, dehydration, or conditions causing reduced plasma volume.
- Basic Technique (Microhematocrit Method): This is a common manual method.
- Step 1: Sample Collection: Collect blood, usually anticoagulated with EDTA.
- Step 2: Filling Capillary Tubes: Fill one or two heparinized (if using capillary blood direct from puncture) or non-heparinized (if using EDTA blood) capillary tubes about two-thirds full with blood. Avoid air bubbles.
- Step 3: Sealing: Seal one end of each capillary tube using clay or a commercial sealing compound.
- Step 4: Centrifugation: Place the sealed tubes in a microhematocrit centrifuge with the sealed end towards the outer edge. Ensure the centrifuge is balanced with a counterbalancing tube if necessary. Centrifuge at high speed (e.g., 10,000-12,000 rpm) for a specified time (e.g., 5 minutes). This separates the blood into layers: packed RBCs at the bottom, followed by a thin buffy coat (WBCs and platelets), and plasma at the top.
- Step 5: Reading: Remove the tubes and immediately read the PCV using a microhematocrit reader. The reader has a scale that allows you to align the bottom of the packed RBC column with the 0% line and the top of the plasma column with the 100% line, then read the percentage level at the top of the packed RBC column (just below the buffy coat).
- Step 6: Averaging: If two tubes were run, average the two readings, provided they are within an acceptable range of each other (e.g., +/- 1%).
3. Red Blood Cell Count (RBCs)
- Purpose: To determine the number of red blood cells in a specific volume of blood.
- Clinical Significance: Low RBC count indicates anemia. High RBC count indicates polycythemia. Evaluating RBC count along with Hb and PCV helps classify the type of anemia (e.g., microcytic, macrocytic).
- Basic Technique (Manual Method using Hemocytometer):
- Step 1: Sample Dilution: A specific volume of blood (anticoagulated with EDTA) is accurately diluted with a specific volume of an isotonic diluting fluid. Common diluting fluids include Hayem’s solution or Gower’s solution, which preserve RBCs and prevent clumping. A typical dilution factor is 1:200 (e.g., 10 µL of blood + 2000 µL of diluting fluid, or more practically, using specific RBC pipettes or micropipettes to achieve the ratio).
- Step 2: Mixing: Mix the diluted sample thoroughly but gently to ensure even distribution of cells without causing hemolysis.
- Step 3: Charging the Hemocytometer: A hemocytometer is a specialized counting chamber with a precisely etched grid. A small volume of the well-mixed, diluted blood is carefully introduced into the chamber under a coverslip, allowing the chamber to fill by capillary action. Avoid introducing air bubbles or overfilling.
- Step 4: Settling: Allow the cells a few minutes (e.g., 2-5 minutes) to settle in the chamber.
- Step 5: Counting: Using a microscope (typically at 40x objective), identify the RBC counting area on the hemocytometer grid. This area is usually the large central square, which is divided into 25 smaller squares, each further divided into 16 tiny squares. Count the RBCs in a specific number of these tiny squares, typically 5 of the smaller squares within the central square (the four corner squares and the central square). Count cells that touch the top and right boundaries of a square, but not those touching the bottom and left boundaries, to avoid counting the same cell twice.
- Step 6: Calculation: Use the following formula to calculate the number of RBCs per cubic millimeter (µL) of undiluted blood: RBCs / µL = (Number of cells counted) x (Dilution Factor) / (Area counted in mm²) x (Depth of the chamber in mm)
- Number of cells counted: The total count from the 5 small squares.
- Dilution Factor: e.g., 200.
- Area counted: The area of the 5 small squares counted. Each small square in the central area is 1/25 of the central square’s area (1 sq mm). The 5 squares counted represent an area of 5 * (1/25) = 0.2 sq mm.
- Depth: The depth of the hemocytometer chamber is typically 0.1 mm.
Therefore, the calculation simplifies to: RBCs / µL = (Number of cells counted in 5 squares) x 200 / (0.2 mm²) x (0.1 mm); RBCs / µL = (Number of cells counted in 5 squares) x 200 / 0.02; RBCs / µL = (Number of cells counted in 5 squares) x 10,000
- Step 7: Reporting: Report the result in cells per microliter (µL) or convert to cells per liter (L) by multiplying by 10⁶ (since 1 L = 10⁶ µL).
Clinical Significance of RBC Values (Hb, PCV, RBC Count):
- Anemia: Decreased levels of Hb, PCV, and/or RBC count. Caused by blood loss, decreased RBC production (e.g., nutritional deficiencies like iron or B12, bone marrow disorders), or increased RBC destruction (hemolysis).
- Polycythemia: Increased levels of Hb, PCV, and/or RBC count. Can be primary (Polycythemia Vera – a bone marrow disorder) or secondary (e.g., chronic hypoxia from lung disease, high altitude, or sometimes kidney disease producing excess erythropoietin).
White Blood Cell Parameters (WBCs and Differential Count)
White blood cells (WBCs), also known as leukocytes, are essential components of the immune system, defending the body against infection and disease. Evaluating WBCs involves counting the total number and determining the percentage of each specific type of WBC.
1. Total Leukocytic Count (TLC) / Total White Blood Cell Count (TWBC)
- Purpose: To determine the total number of all types of white blood cells in a specific volume of blood.
- Clinical Significance: An elevated TLC (leukocytosis) often indicates infection, inflammation, stress, or certain leukemias. A decreased TLC (leukopenia) can result from bone marrow suppression (e.g., due to chemotherapy or radiation), overwhelming infections, autoimmune diseases, or certain medications.
- Basic Technique (Manual Method using Hemocytometer):
- Step 1: Sample Dilution: Blood (anticoagulated with EDTA) is diluted with a solution that lyses (breaks open) the red blood cells but preserves the white blood cells. A common diluting fluid is Turk’s solution (contains glacial acetic acid to lyse RBCs and gentian violet for staining WBC nuclei). A typical dilution factor is 1:20 (e.g., 50 µL of blood + 950 µL of diluting fluid).
- Step 2: Mixing: Mix the diluted sample thoroughly. Allow a few minutes for RBC lysis to complete.
- Step 3: Charging the Hemocytometer: As with the RBC count, charge the hemocytometer chamber carefully with the diluted sample.
- Step 4: Settling: Allow cells to settle for a few minutes (e.g., 5-10 minutes).
- Step 5: Counting: Using a microscope (typically at 10x objective), identify the four large corner squares on the hemocytometer grid. Count the WBCs within these four squares. Count cells touching the top and right boundaries, excluding those on the bottom and left. The WBCs appear as small dots/circles with visible nuclei (stained purple by Turk’s solution).
- Step 6: Calculation: Use the following formula: WBCs / µL = (Number of cells counted) x (Dilution Factor) / (Area counted in mm²) x (Depth of the chamber in mm)
- Number of cells counted: The total count from the 4 large corner squares.
- Dilution Factor: e.g., 20.
- Area counted: The area of the 4 large corner squares. Each large corner square is 1 sq mm. The 4 squares counted represent an area of 4 sq mm.
- Depth: The depth of the hemocytometer chamber is 0.1 mm.
Therefore, the calculation is: WBCs / µL = (Number of cells counted in 4 squares) x 20 / (4 mm²) x (0.1 mm); WBCs / µL = (Number of cells counted in 4 squares) x 20 / 0.4; WBCs / µL = (Number of cells counted in 4 squares) x 50
- Step 7: Reporting: Report the result in cells per microliter (µL) or convert to cells per liter (L) by multiplying by 10⁶.
2. Differential Leukocytic Count (DLC)
- Purpose: To determine the relative percentage of each type of white blood cell present in the blood: Neutrophils, Lymphocytes, Monocytes, Eosinophils, and Basophils.
- Clinical Significance: The relative proportions of each WBC type provide specific diagnostic clues. For example:
- Increased Neutrophils (Neutrophilia): Often seen in bacterial infections, inflammation, stress.
- Increased Lymphocytes (Lymphocytosis): Common in viral infections, some chronic infections, certain leukemias (CLL).
- Increased Monocytes (Monocytosis): Associated with chronic inflammation, recovery phase of infection, certain leukemias (CML, CMML).
- Increased Eosinophils (Eosinophilia): Typically seen in allergic reactions, parasitic infections, some skin conditions.
- Increased Basophils (Basophilia): Less common, can be seen in allergic reactions, chronic inflammation, certain leukemias (CML).
- Decreased counts (Neutropenia, Lymphopenia, etc.) are also clinically significant.
- Basic Technique (Manual Method using Wright or Wright-Giemsa Stained Blood Smear):
- Step 1: Prepare a Blood Smear: A drop of blood (fresh capillary blood or EDTA blood) is placed on one end of a clean glass slide. A second slide (spreader slide) is used at an angle (e.g., 30-45 degrees) to spread the blood evenly along the slide, creating a thin film with a “feathered” edge. The smear is allowed to air dry completely.
- Step 2: Stain the Smear: The dried smear is stained using a differential stain like Wright’s stain or Wright-Giemsa stain. This multi-component stain differentiates cell types based on their chemical affinity for acidic and basic dyes. The staining process typically involves fixing the smear (often part of the stain solution), applying the stain, buffering, and washing with water.
- Step 3: Microscopic Examination: Place the stained smear on a microscope stage.
- First, examine the smear under low power (10x objective) to assess overall quality, check the distribution of cells, and locate the “counting area” (usually the thin part of the smear just behind the feathered edge, where cells are evenly distributed and not distorted).
- Apply immersion oil to the counting area and switch to the oil immersion objective (100x objective).
- Count and identify each type of white blood cell encountered while systematically scanning the counting area. Use a mechanical stage to move the slide in a specific pattern (e.g., “battlement” or zigzag pattern) to avoid counting the same area twice and to ensure all areas of the counting region are examined.
- Count a minimum of 100 white blood cells (counting 200 cells provides greater statistical accuracy). Use a manual tally counter or electronic counter to keep track of each cell type.
- Step 4: Calculate the Relative Leukocytic Count: Once the counting is complete (e.g., 100 or 200 cells), calculate the percentage of each cell type relative to the total number of WBCs counted. Percentage (%) of Cell Type = (Number of specific cell type counted / Total WBCs counted) x 100. For example, if you counted 100 WBCs and found 60 Neutrophils, 30 Lymphocytes, 5 Monocytes, 4 Eosinophils, and 1 Basophil:
- Neutrophils = (60 / 100) * 100 = 60%
- Lymphocytes = (30 / 100) * 100 = 30%
- Monocytes = (5 / 100) * 100 = 5%
- Eosinophils = (4 / 100) * 100 = 4%
- Basophils = (1 / 100) * 100 = 1% (The percentages should add up to 100%).
- Step 5: Reporting: Traditionally, the results are reported as percentages. It is also important to note any morphological abnormalities observed in red cells, white cells, or platelets during the microscopic examination.
Clinical Significance of Total and Differential Leukocytic Counts:
Understanding the clinical significance involves considering both the Total Leukocyte Count (TLC) and the Differential Leukocyte Count (DLC).
- Total Count Abnormalities: As mentioned, leukocytosis (high TLC) suggests an overall increase in WBC production, often due to infection or inflammation. Leukopenia (low TLC) suggests reduced production or increased destruction.
- Differential Count Abnormalities:
- Changes in relative percentages point towards which specific type of WBC is responsible for the overall change (if TLC is also abnormal) or whether there’s a shift in proportions even with a normal TLC. For instance, a patient might have a normal TLC but a high relative percentage of lymphocytes and a low relative percentage of neutrophils (a “relative lymphocytosis” and “relative neutropenia”), which could still be significant, especially if absolute counts are considered.
- Absolute Leukocytic Count: While the request specifically asks about relative calculation and significance, it’s crucial to understand that absolute counts are often more clinically informative than relative percentages. The absolute count of a specific cell type is calculated by multiplying the total WBC count by the relative percentage of that cell type: Absolute Count of Cell Type / µL = TLC / µL x (% of Cell Type / 100). For example, if TLC is 10,000/µL and Lymphocytes are 30%, the absolute lymphocyte count is 10,000 * (30/100) = 3,000/µL. Clinical laboratories typically report both relative percentages and absolute counts when automated analyzers are used. In manual methods, after performing the TLC and DLC, one can calculate the absolute counts.
Conclusion
Mastering these basic hematological techniques is foundational for anyone working in a clinical laboratory setting. Accurately performing Hb, PCV, RBC count, total, and differential WBC counts, and correctly interpreting their values, provides essential information for patient diagnosis.

