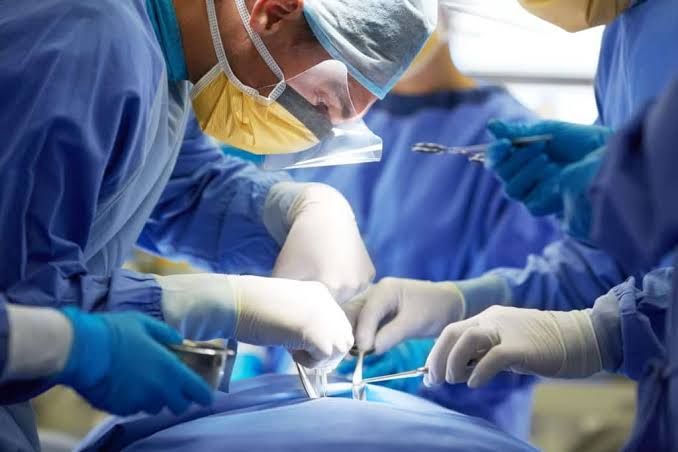
Organ donation is a profound act of generosity that offers life and hope to individuals suffering from end-stage organ failure. The safe and efficient recovery of organs is paramount not only to maximize the viability of the retrieved organs but also to uphold the dignity of the donor. This procedure requires a high level of technical skill, sterile technique, prompt decision-making, and effective communication. Understanding the standard protocols for brain-dead donors and the unique challenges presented by DCD donors is essential for all personnel involved.
General Principles of Safe Abdominal Organ Recovery
Regardless of the donor type, several core principles underpin safe abdominal organ recovery:
- Sterility: Maintaining a sterile field throughout the procedure is non-negotiable to prevent contamination of the organs and the donor.
- Timing: Minimizing warm and cold ischemia times is critical for organ viability.
- Anatomical Knowledge: A thorough understanding of abdominal anatomy, including common variations and the vascular supply to each organ, is essential for precise dissection and minimizing injury.
- Careful Dissection: Tissues should be handled gently to avoid damage, particularly to delicate structures like the bile ducts, pancreatic ducts, and smaller blood vessels.
- Adequate Preservation: Proper flushing with preservation solutions and subsequent cooling (cold ischemia) are vital for maintaining organ function ex vivo.
- Coordination: Effective communication and coordination among the procurement team, operating room staff, and other organ-specific teams (if applicable) are necessary for a smooth and efficient procedure.
- Respect: Treating the donor’s body with the utmost respect throughout the process is a fundamental ethical obligation.
Step-by-Step Guide to Abdominal Organ Recovery (Brain-Dead Donors)
This section details the general procedure for deceased donors declared brain dead.
Step 1: Pre-Operative Preparation and Briefing
- Arrival and Team Assembly: The procurement team arrives at the hospital, typically comprised of surgeons, procurement coordinators, surgical assistants, and potentially perfusionists. All necessary personnel who will be scrubbing in should be present.
- Review of Donor Information: The team thoroughly reviews the donor’s medical history, blood work, imaging studies, and organ suitability assessments provided by the Organ Procurement Organization (OPO). Potential anatomical variations or past surgical interventions are noted.
- Briefing with OR Staff and OPO Coordinator: A briefing session is held with the operating room (OR) nursing staff, anesthesia team (if present for physiological management until cross-clamp), and the OPO coordinator. Roles and responsibilities are clarified, the planned procedure sequence is discussed, and any specific requirements (e.g., special instruments, preservation solutions) are confirmed.
- Preparation of Instruments and Solutions: The OR staff, guided by the procurement team’s surgical assistants, prepares the sterile instrument trays, preservation solutions (e.g., UW, HTK), ice slush, and necessary cannulation equipment.
- Donor Preparation: The donor is brought to the operating room. Standard pre-operative skin preparation (antiseptic scrub) is performed covering the entire abdomen and chest, extending from the neck to the mid-thigh. Sterile draping is then meticulously applied to create a large sterile field.
Step 2: Incision and Initial Exploration
- Incision: A long midline incision is made from the sternal notch to the pubis. The incision is carried through the skin, subcutaneous tissue, and fascia to enter the abdominal cavity.
- Initial Exploration: The abdominal cavity is carefully explored to assess the general anatomy, identify any unexpected pathology, and confirm the position and condition of the organs planned for recovery. The presence of excessive ascites, adhesions, or unusual anatomy is noted.
Step 3: Dissection and Isolation of Key Structures
- Exposure: Retractors are used to provide optimal exposure of the abdominal contents.
- Lower Abdomen: The dissection typically begins in the lower abdomen to access the aorta and inferior vena cava (IVC) in the iliac region. The ureters are identified and protected or ligated below the level of the kidneys.
- Upper Abdomen: Attention then shifts to the upper abdomen. Key structures are carefully dissected and isolated:
- Liver: The ligaments suspending the liver (falciform, triangular, coronary) are divided. The suprahepatic IVC (above the liver) and infrahepatic IVC (below the liver) are exposed. The porta hepatis structures – common hepatic duct, hepatic artery, and portal vein – are identified and dissected.
- Kidneys: The kidneys are mobilized by dividing their peritoneal attachments. The renal arteries and veins are identified arising from the aorta and IVC, respectively. The ureters are dissected down to the bladder.
- Pancreas: The pancreas is carefully mobilized from the retroperitoneum. The superior mesenteric artery (SMA) and vein (SMV), which run posterior to the pancreas and are crucial for pancreatic blood supply, are identified. The splenic artery is also located.
- Intestines: The intestines are moved to the side of the abdomen to facilitate access to the retroperitoneal structures. Their arterial supply via the SMA is crucial for pancreas and intestine recovery.
Step 4: Cannulation and Preparation for Flush
- Aortic Cannulation: Cannulas are inserted into the infra-renal aorta. Typically, one or two large-bore cannulas are used. The aorta is ligated distally to the cannulation site to direct the perfusate flow upwards.
- Portal Vein Cannulation: A large-bore cannula is inserted into the portal vein (formed by the confluence of the SMV and splenic vein).
- IVC Transection/Venting: The infrahepatic IVC is typically transected just above the diaphragm or cannulated to allow the preservation solution and blood to drain freely during the flush, preventing organ congestion.
- Preparation for Cross-Clamp: The supra-celiac aorta (above the celiac axis, which supplies the upper abdominal organs) is dissected and encircled with a clamp or ligature. This is the point where blood flow will be stopped.
Step 5: Cross-Clamp, In-Situ Flush, and Cooling
- Cross-Clamp: The supra-celiac aorta is cross-clamped. Simultaneously, if anesthesia has been maintaining physiological support, the ventilator is turned off. This marks the beginning of cold ischemia time for the abdominal organs.
- In-Situ Flush: Immediately upon cross-clamping, the cold preservation solution is rapidly infused via the aortic cannula. This flushes blood from the organs and cools them internally. The portal vein cannula is also used to infuse solution, primarily for the intestine, pancreas, and liver.
- External Cooling: Throughout the flush, copious amounts of sterile ice slush are packed around the abdominal organs to provide rapid external cooling. This synergistic cooling (internal and external) is vital for preservation.
Step 6: Organ Removal (Procurement)
- Systematic Excision: The organs are systematically excised. While the exact sequence can vary slightly depending on the organs recovered and the teams present, a common approach is to recover the block containing the liver, pancreas, duodenum, and potentially segments of the aorta and IVC supplying the kidneys.
- Division of Structures: The aorta and IVC are divided appropriately. The suprahepatic IVC is divided. The porta hepatis structures are divided proximal to the liver. The pancreatic neck/body is transected. The SMA and SMV are divided. The kidneys are then individually excised, dividing the main renal artery(ies), renal vein(s), and ureter(s) with adequate length whenever possible.
- Bloc vs. Individual: Some centers may recover organs en bloc (e.g., kidneys with a segment of aorta and IVC, pancreas with duodenum and segments of vessels) and then separate them on the back table, while others prefer more individual dissection in situ.
- Back Table Preparation: Once removed, organs are typically transferred to a sterile back table where they are further dissected, trimmed, and prepared for packaging (e.g., inspection of vessels, removal of excess tissue).
Step 7: Packaging and Transport
- Packaging: Each organ is placed in a sterile container with cold preservation solution, often within multiple sterile bags or layers.
- Cooling: The bagged organ is then placed into a cooler filled with ice, ensuring the organ remains cold during transport.
- Labeling and Documentation: Each package is clearly labeled with donor information, organ type, and procurement time. Detailed documentation of the procedure is completed.
Step 8: Closure and Restoration
- Closure: The abdominal cavity is closed by suturing the fascia and skin.
- Restoration: The donor’s body is prepared for release, ensuring it is presented in a dignified manner. All instruments and materials are accounted for and cleaned.
Safe Recovery of Abdominal Organs from Donation After Cardiac Death (DCD) Donors
DCD organ recovery presents unique challenges due to the period of warm ischemia that occurs after circulation ceases but before the organs are cooled. The priority in DCD recovery is minimizing this warm ischemia time and initiating rapid cooling and preservation.
Specific Steps for DCD Recovery:
- Pre-Arrest Preparation: In controlled DCD scenarios, preparations similar to brain-dead donors are made. The team is assembled, the patient is in the OR, and instruments/solutions are ready.
- Declaration of Death: Following the withdrawal of life support, a period of observation occurs to confirm irreversible cessation of circulatory and respiratory function. The donor is declared dead by a physician who is not part of the transplant or procurement team.
- Rapid Access and Cannulation: Immediately after declaration of death (within minutes), the abdomen is rapidly opened via a midline incision. The aorta and IVC are quickly identified and cannulated, typically in the chest or upper abdomen (supra-celiac aorta) and the lower IVC. This step is often performed extremely rapidly.
- In-Situ Flush and Cooling (Hypothermic Perfusion): Cold preservation solution is immediately infused through the aortic cannula. This rapid, high-flow perfusion is critical to quickly lower the core temperature of the organs and stop the detrimental effects of warm ischemia. The IVC is vented to allow drainage. Simultaneously, sterile ice slush is packed around the organs. Some protocols may also involve flushing via the portal vein.
- Assessment of Viability: After the flush and cooling period (which can vary depending on the protocol), the organs aresystematically evaluated for viability based on their appearance, perfusion characteristics, and potentially biopsies. Organs may be deemed non-suitable if warm ischemia injury is suspected to be excessive.
- Organ Removal: The procurement procedure then largely follows the steps for brain-dead donors (Step 6 above), systematically dissecting and removing the viable organs.
- Back Table Preparation, Packaging, and Transport: These steps are similar to those for brain-dead donors (Steps 7 & 8), with particular attention paid to documentation regarding the warm ischemia time interval.
Key Safety Considerations in DCD Recovery:
- Time is Critical: Every second counts between circulatory arrest and the start of cold perfusion. Protocols are designed for extreme efficiency.
- Legal/Ethical Compliance: Strict adherence to local and national protocols regarding declaration of death and the timing of the procedure is mandatory.
- Assessment of Injury: Teams must be familiar with assessing organs for signs of warm ischemic injury during and after the flush.
- Donor Dignity: Despite the urgency, maintaining respect for the donor remains paramount.
Familiarity with Appropriate Courtesy and Etiquette
Conducting oneself with professionalism, courtesy, and respect is integral to the organ recovery process. Organ recovery involves collaboration with numerous individuals and teams.
- To Organ Procurement Organization (OPO) Personnel:
- Communicate clearly and promptly.
- Respect their role as the primary liaison with the donor family and hospital.
- Provide updates on the procedure’s progress.
- Adhere to OPO protocols and reporting requirements.
- Express gratitude for their coordination efforts.
- To Operative Staff (Nurses, Anesthesiologists, Technicians):
- Introduce yourselves clearly.
- Brief them thoroughly on the procedure plan, required instruments, and anticipated timeline.
- Be specific and polite with requests for instruments or supplies.
- Acknowledge their assistance and contributions.
- Maintain a calm, professional demeanor even under pressure.
- Ensure the OR is left clean and tidy after the case.
- To Other Organ Procurement Teams (Single and Multi-Organ Procurement):
- Communicate the planned sequence of recovery if multiple teams are present (e.g., thoracic, abdominal, bone/tissue). The most experienced or the designated lead team often guides the flow.
- Respect each team’s needs regarding dissection, access, and timing of cross-clamp.
- Offer assistance where appropriate and feasible.
- Maintain a collegial and cooperative atmosphere. This is not a competition but a shared mission.
- Avoid interrupting or interfering with another team’s critical dissection steps, especially near the cross-clamp phase.
- To the Donor:
- Treat the donor’s body with the utmost respect and dignity at all times.
- Minimize unnecessary exposure.
- Handle tissues gently.
- Perform closure and restoration meticulously to leave the body in a state that can be viewed by the family if they choose.
- General Etiquette:
- Minimize unnecessary conversation in the OR.
- Maintain a focus on the task at hand.
- Adhere to hospital policies regarding attire, sterile technique, and conduct.
- Problem-solve calmly and collaboratively.
Conclusion
The safe recovery of abdominal organs from deceased donors is a complex, demanding, and ultimately life-affirming procedure. It requires exceptional technical skill, strict adherence to safety protocols, and a deep appreciation for the value of the gift being given. By understanding the detailed steps involved, particularly the specific considerations for DCD recovery, and by consistently demonstrating professionalism, courtesy, and respect towards the donor and all involved personnel, procurement teams can ensure the best possible outcomes for transplant recipients and honor the legacy of the donor. Continuous training, simulation, and multidisciplinary review are vital for maintaining proficiency and upholding the highest standards in this critical field.

