Essential Microbial Staining Techniques: Gram and Acid-Fast Bacillus Staining
Introduction
Microbial staining is a fundamental technique in microbiology, crucial for visualizing microorganisms that are often transparent or difficult to see under a standard light microscope. Staining enhances visibility by coloring the organisms or their surroundings. Beyond simple visualization, differential staining techniques utilize multiple stains and reagents to differentiate bacteria based on their structural or chemical properties.
Gram Staining
The Gram stain, developed by Hans Christian Gram in 1884, is a cornerstone technique used to classify bacteria into two large groups: Gram-positive and Gram-negative. This differentiation is based on differences in their cell wall composition, particularly the thickness of the peptidoglycan layer.
Theory and Principle of Gram Staining
Gram staining is a differential staining method that relies on the ability of the bacterial cell wall to retain a crystal violet-iodine complex following decolorization with alcohol or acetone.
- Gram-Positive Bacteria: Possess a thick layer of peptidoglycan in their cell wall, often reinforced with teichoic acids. When stained with crystal violet and treated with iodine (which acts as a mordant, forming a large complex with crystal violet), the crystal violet-iodine (CV-I) complex becomes trapped within the dense peptidoglycan mesh. The subsequent decolorization step using alcohol or acetone causes dehydration of the thick peptidoglycan layer, shrinking the pores and effectively trapping the large CV-I complex inside the cell. Thus, Gram-positive cells resist decolorization and retain the purple color of the primary stain.
- Gram-Negative Bacteria: Have a much thinner peptidoglycan layer surrounded by an outer membrane composed of lipids, proteins, and lipopolysaccharides (LPS). The CV-I complex forms within the cell, but the thin peptidoglycan layer cannot retain it effectively. The decolorizing agent (alcohol/acetone) dissolves the lipids in the outer membrane, increasing its permeability and allowing the CV-I complex to escape the thin peptidoglycan layer. Consequently, Gram-negative cells are decolorized and lose the purple stain.
Following decolorization, a counterstain (usually safranin) is applied. Since the Gram-positive cells are already stained purple, they are not significantly affected by the counterstain. However, the decolorized Gram-negative cells readily take up the safranin, appearing pink or red.
Summary of Reagent Function:
- Primary Stain (Crystal Violet): Stains all bacterial cells purple.
- Mordant (Gram’s Iodine): Forms a large, insoluble crystal violet-iodine complex within the cells.
- Decolorizer (Alcohol or Acetone): Removes the CV-I complex from Gram-negative cells but not from Gram-positive cells. This is the critical differentiation step.
- Counterstain (Safranin): Stains the decolorized Gram-negative cells pink/red.
Expected Results:
- Gram-Positive bacteria appear purple.
- Gram-Negative bacteria appear pink/red.
Performing Gram Staining According to Guidelines
Performing Gram staining accurately requires careful attention to detail, especially during the decolorization step, which is the most common source of error.
Materials:
- Clean glass slides
- Bunsen burner or slide warmer (for fixation)
- Microscope
- Inoculating loop or sterile swab
- Distilled water
- Staining rack
- Blotting paper
- Immersion oil
- Reagents: Crystal Violet, Gram’s Iodine, Decolorizer (95% ethanol, acetone, or a mixture), Safranin.
- Personal Protective Equipment (PPE): Lab coat, gloves, eye protection.
Procedure:
Step 1: Prepare and Fix the Smear
- Obtain a sample: This could be a liquid culture, a colony from an agar plate, or a clinical specimen.
- Prepare the smear:
- If using liquid culture: Place a drop or two of the bacterial suspension in the center of a clean glass slide. Spread it thinly and evenly over an area about the size of a dime.
- If using solid culture (colony): Place a small drop of distilled water on the slide. Pick up a very small amount of the bacterial colony with a sterile loop or needle and emulsify it thoroughly in the water droplet. Spread thinly. Avoid making the smear too thick.
- If using a clinical specimen (e.g., sputum): Follow laboratory-specific protocols for preparing a thin smear.
- Air dry: Allow the smear to air dry completely at room temperature. This is crucial before fixation. The smear should appear dull or slightly opaque.
- Heat fix: Carefully pass the slide, smear side up, through the flame of a Bunsen burner 2-3 times. The slide should be warm to the touch but not too hot to handle. Alternatively, use a slide warmer at approximately 60°C for 10-15 minutes. Heat fixation adheres the bacteria to the slide and kills them, making them safe to handle and preserving their morphology. (Overheating can distort cell morphology).
Step 2: Apply Stains and Reagents
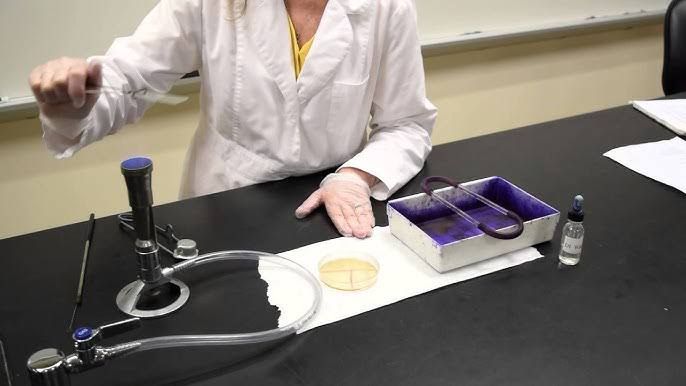
Place the heat-fixed slide on a staining rack over a sink or waste tray.
- Primary Stain (Crystal Violet): Flood the smear with Crystal Violet solution. Allow to stand for 30 seconds to 1 minute (follow specific protocol time).
- Rinse: Gently rinse the slide with distilled water. Direct the water flow above the smear and let it run down over the smear to avoid washing off the bacteria.
- Mordant (Gram’s Iodine): Flood the smear with Gram’s Iodine solution. Allow to stand for 1 minute. This step fixes the crystal violet within the cell wall.
- Rinse: Gently rinse the slide with distilled water as in step 2.
- Decolorizer (Alcohol/Acetone): This is the most critical step. Hold the slide at a slight angle and apply the decolorizing agent drop by drop to the smear. Watch the color run off. Stop adding decolorizer as soon as the liquid running off the slide is clear or just faintly tinged with purple. This usually takes only a few seconds (typically 5-15 seconds, but do not time rigidly – base it on the runoff color). Over-decolorization will cause Gram-positive cells to appear Gram-negative. Under-decolorization will cause Gram-negative cells to appear Gram-positive.
- Rinse: Immediately rinse the slide thoroughly with distilled water to stop the decolorization process.
- Counterstain (Safranin): Flood the smear with Safranin solution. Allow to stand for 30 seconds to 1 minute.
- Rinse: Gently rinse the slide with distilled water.
Step 3: Dry and Observe
- Dry: Carefully blot the slide dry with absorbent paper (e.g., bibulous paper). Do not rub. Alternatively, allow the slide to air dry completely in a vertical position.
- Observe: Place a drop of immersion oil on the stained smear. View the slide under a light microscope using the oil immersion objective lens (100x magnification).
Key Considerations & Quality Control for Gram Staining:
- Use fresh reagents.
- Use control slides (known Gram-positive and Gram-negative bacteria) to ensure the reagents and technique are working correctly.
- Pay close attention to the decolorization step. This is the most common source of error.
- Avoid making smears that are too thick.
- Use young bacterial cultures (typically 18-24 hours old); older cultures can lose their ability to retain the Gram stain correctly.
Acid-Fast Bacillus (AFB) Staining
Acid-Fast Bacillus (AFB) staining is another differential staining technique used to identify bacteria that have a unique cell wall structure resistant to decolorization by acids. It is primarily used to detect Mycobacterium species, including Mycobacterium tuberculosis (the causative agent of tuberculosis) and Mycobacterium leprae (the causative agent of leprosy), as well as some species of Nocardia.
2.1 Theory and Principle of AFB Staining
AFB staining works because acid-fast bacteria have a high concentration of mycolic acids, a waxy lipid, in their cell walls. This mycolic acid layer makes the cells impermeable to many stains and also resistant to decolorization by acid-alcohol.
The most common method is the Ziehl-Neelsen (ZN) method, although the Kinyoun method (cold stain) is also used. We will detail the ZN method.
- Primary Stain (Carbolfuchsin): Carbolfuchsin is a lipid-soluble stain that can penetrate the waxy mycolic acid layer. In the ZN method, gentle heating (steaming) is applied during the staining step to enhance the penetration of carbolfuchsin into the cell wall. Once inside, the stain becomes tightly bound to the mycolic acids.
- Decolorizer (Acid-Alcohol): A strong decolorizing solution (typically 3% HCl in 95% ethanol) is applied. This solution effectively removes the carbolfuchsin from most background material and non-acid-fast cells. However, the strong bond between carbolfuchsin and the mycolic acids in acid-fast bacteria resists this decolorization. The term “acid-fast” refers to this property of retaining the stain despite treatment with acid-alcohol.
- Counterstain (Methylene Blue or Malachite Green): A counterstain is applied to color the decolorized non-acid-fast cells and background material. Methylene Blue is commonly used, coloring these components blue. Malachite Green can also be used, resulting in a green background.
Summary of Reagent Function (Ziehl-Neelsen Method):
- Primary Stain (Carbolfuchsin): Stains all cells and background red/pink (with heat to facilitate penetration).
- Decolorizer (Acid-Alcohol): Removes the carbolfuchsin from non-acid-fast cells and background.
- Counterstain (Methylene Blue or Malachite Green): Stains the decolorized non-acid-fast cells and background blue or green.
Expected Results (Ziehl-Neelsen Method):
- Acid-Fast Bacilli (AFB) appear bright red or pink, often slender, rod-shaped.
- Non-acid-fast bacteria and background material appear blue (if Methylene Blue is used) or green (if Malachite Green is used).
Performing AFB Staining According to Guidelines (Ziehl-Neelsen Method)
AFB staining, particularly on clinical specimens, requires specific safety precautions due to the potential presence of highly infectious organisms like M. tuberculosis.
Materials:
- Clean glass slides
- Bunsen burner or hot plate (for heating Carbolfuchsin)
- Microscope
- Inoculating loop or sterile swab
- Distilled water
- Staining rack
- Blotting paper
- Immersion oil
- Reagents: Carbolfuchsin, Acid-Alcohol decolorizer, Counterstain (Methylene Blue or Malachite Green).
- PPE: Lab coat, gloves, eye protection, potentially respiratory protection and use of a biosafety cabinet depending on the specimen source and risk assessment.
Procedure:
Step 1: Prepare and Fix the Smear
- Obtain a sample: Commonly sputum, but can be other fluids or tissues. Handle with appropriate biosafety level precautions.
- Prepare the smear: Make a thin, even smear on a clean glass slide. For viscous samples like sputum, dispersion might be needed before spreading.
- Air dry: Allow the smear to air dry completely.
- Heat fix: Heat fix the smear thoroughly. Pass the slide through a flame several times or use a slide warmer (e.g., 60°C for 2 hours or 65°C for 30 minutes). Proper heat fixation is critical for inactivating potential pathogens and preventing the smear from washing off.
Step 2: Apply Stains and Reagents (Ziehl-Neelsen Method)
Place the heat-fixed slide on a staining rack.
- Primary Stain (Carbolfuchsin) with Heating: Flood the smear with Carbolfuchsin solution. Heat the slide gently from underneath using a Bunsen burner or hot plate until steam rises. Maintain steaming for 5 minutes, periodically adding more stain if needed to prevent drying. Do not boil. The heating step facilitates the penetration of the waxy cell wall.
- Cool and Rinse: Allow the slide to cool for a few minutes. Then, rinse the slide thoroughly with distilled water until no more red color runs off.
- Decolorizer (Acid-Alcohol): Flood the smear with Acid-Alcohol decolorizer. Allow the decolorizer to act for 1-3 minutes, or add drop by drop until no more red color runs off the slide. This step removes the stain from non-acid-fast cells.
- Rinse: Rinse the slide thoroughly with distilled water to stop decolorization.
- Counterstain (Methylene Blue or Malachite Green): Flood the smear with the counterstain. Allow to stand for 30 seconds to 1 minute. This stains the background and non-acid-fast cells.
- Rinse: Rinse the slide thoroughly with distilled water.
Step 3: Dry and Observe
- Dry: Carefully blot the slide dry or air dry completely.
- Observe: Place a drop of immersion oil on the stained smear. View the slide under a light microscope using the oil immersion objective lens (100x magnification). Scan multiple fields (at least 300 fields are often recommended for screening) looking for bright red/pink rods against a blue/green background. Report the number of AFB observed per field according to standard guidelines (e.g., CDC, WHO).
Key Considerations & Quality Control for AFB Staining:
- Strict adherence to biosafety protocols is essential, especially when handling clinical specimens.
- Ensuring the heating step during Carbolfuchsin application is done correctly in the ZN method.
- Using fresh acid-alcohol decolorizer.
- Using control slides (known positive for AFB and a negative control) every time the stain is performed.
- Scanning a sufficient number of fields under the microscope to ensure detection, as AFB can be sparse in specimens.
Defining Culture and Culture Media
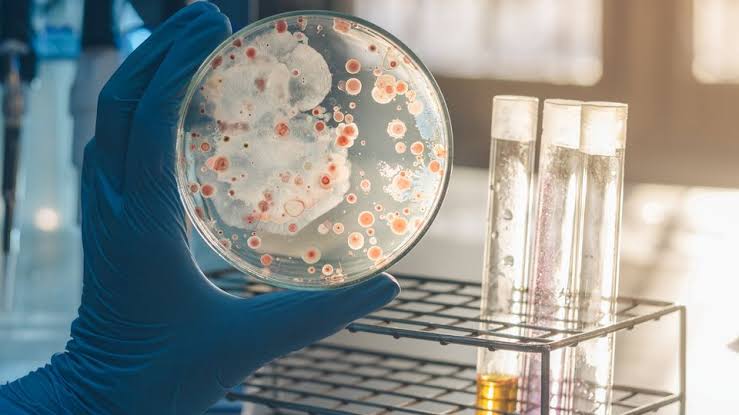
At its core, microbial culture is the process of growing microorganisms in a controlled laboratory environment. This is achieved by providing the essential nutrients, moisture, temperature, and atmospheric conditions necessary for their proliferation. Culturing microbes allows microbiologists to:
- Isolate a specific type of microorganism from a mixed sample.
- Identify the microorganism responsible for an infection or present in a sample (e.g., food, water, environmental).
- Study the morphology, physiology, and biochemical characteristics of the organism.
- Perform susceptibility testing to determine effective treatments.
- Harvest microbial products (like enzymes, antibiotics, or vaccines).
Culture media (singular: medium) are the nutrient-rich preparations used for growing microorganisms in the laboratory. These media provide the necessary chemical and physical conditions for microbial growth. The composition of culture media varies widely depending on the specific nutritional requirements of the target organism.
Essential components typically found in culture media include:
- Water: Provides the aqueous environment for metabolic reactions.
- Carbon Source: Provides energy and building blocks (e.g., glucose, lactose, peptones).
- Nitrogen Source: Provides nitrogen for protein and nucleic acid synthesis (e.g., peptones, amino acids, inorganic salts).
- Inorganic Salts: Provide essential minerals like phosphates, sulfates, calcium, magnesium, and trace elements vital for enzymatic activity and osmotic balance.
- Growth Factors: Some organisms require specific vitamins, amino acids, or other organic compounds they cannot synthesize themselves.
- Buffering Agents: Maintain a stable pH, as microbial metabolism can produce acidic or alkaline waste products.
- Solidifying Agents (for solid media): Substances like agar (a polysaccharide extracted from seaweed) are used to create solid or semi-solid media surfaces, allowing for the isolation of individual colonies.
Culture media can be classified based on their physical state (liquid, semi-solid, solid), chemical composition (chemically defined or complex), or functional purpose (general-purpose, enriched, selective, differential, transport).
Culture Media for Bacteria, Viruses, and Fungi
The diverse nutritional needs and biological characteristics of bacteria, viruses, and fungi necessitate the use of different types of culture media.
1. Culture Media for Bacteria:
Bacteria exhibit a wide range of nutritional requirements, from simple inorganic compounds to complex organic molecules. Bacterial media are the most varied and commonly used types.
- General Purpose Media: Support the growth of a wide variety of non-fastidious bacteria. Examples include:
- Nutrient Agar (NA) / Nutrient Broth (NB): Composed of peptone, beef extract, and sodium chloride, providing basic nutrients. Agar is added for solid media.
- Tryptic Soy Agar (TSA) / Tryptic Soy Broth (TSB): Richer than NA/NB, containing enzymatically digested casein and soybean meal. Supports the growth of many common bacteria.
- Enriched Media: Contain added growth factors, such as blood, serum, or vitamins, to support the growth of fastidious organisms (those with complex nutritional needs). Examples include:
- Blood Agar (BA): TSA or TSB base enriched with 5-10% sterile sheep blood. Allows for the detection of hemolytic activity (lysis of red blood cells).
- Chocolate Agar: Blood agar that has been heated to lyse the red blood cells, releasing hemoglobin and other intracellular nutrients. Used for fastidious bacteria like Haemophilus and Neisseria.
- Selective Media: Contain inhibitors that suppress the growth of unwanted organisms while allowing the target organism to grow. Examples include:
- MacConkey Agar (MAC): Contains bile salts and crystal violet, which inhibit the growth of Gram-positive bacteria. Used for selective isolation of Gram-negative enteric bacteria.
- Mannitol Salt Agar (MSA): Contains a high concentration of salt (7.5%), which inhibits most bacteria except halotolerant organisms like Staphylococcus species.
- Differential Media: Contain indicators (like dyes or pH indicators) that allow for the differentiation of organisms based on their metabolic activities (e.g., fermentation of sugars). Examples include:
- MacConkey Agar (MAC): Also differential. Lactose-fermenting bacteria produce acid, which turns the neutral red indicator pink/red. Non-lactose fermenters remain colorless.
- Blood Agar (BA): Also differential. Allows differentiation based on types of hemolysis (alpha, beta, gamma).
- Eosin Methylene Blue (EMB) Agar: Inhibits Gram-positive bacteria (with partial selectivity) and differentiates Gram-negative bacteria based on lactose fermentation. Strong fermenters produce a green metallic sheen (E. coli), weaker fermenters produce pink colonies, and non-fermenters are colorless.
- Transport Media: Designed to maintain the viability of organisms during transport without allowing significant multiplication, preserving the original microbial population balance. Example: Stuart’s Transport Medium.
2. Culture Media for Viruses:
Viruses are obligate intracellular parasites, meaning they can only replicate within living host cells. They cannot be grown on acellular culture media like agar plates or broths used for bacteria and fungi. Viral culture requires the use of live host systems:
- Cell Cultures: The most common method. Susceptible host cells are grown in a suitable nutrient medium (e.g., Eagle’s Minimum Essential Medium, RPMI 1640) within flasks, tubes, or multi-well plates. The virus sample is inoculated into the cell culture, and the cells are monitored for cytopathic effects (CPE), which are visible changes in the cells caused by viral infection and replication (e.g., cell rounding, detachment, lysis, syncytia formation).
- Embryonated Eggs: Historically used, particularly for cultivating influenza viruses for vaccine production. Specific routes of inoculation (e.g., amniotic sac, allantoic sac) are used depending on the virus.
- Experimental Animals: Used for viruses that do not grow well in cell cultures or embryonated eggs, or for studying viral pathogenesis in vivo. Less common today due to ethical considerations and the availability of cell culture techniques.
3. Culture Media for Fungi:
Fungi (including yeasts and molds) are eukaryotes and generally grow slower than bacteria. They typically tolerate lower pH conditions and prefer higher sugar concentrations than many bacteria.
- Sabouraud Dextrose Agar (SDA): The most widely used medium for fungal culture. It contains glucose and peptones with a slightly acidic pH (around 5.6), which inhibits most bacteria while favoring fungal growth. Antibiotics (like chloramphenicol or gentamicin) are often added to make it more selective by suppressing bacterial contamination.
Methods for Antibiotic Susceptibility Testing (AST)
Antibiotic susceptibility testing is crucial for guiding the selection of appropriate antimicrobial therapy. It determines whether a specific bacterial isolate is susceptible (likely to be inhibited by the antibiotic at clinically achievable concentrations) or resistant (not likely to be inhibited).
Two common methods are the Tube Dilution technique and the Paper Diffusion technique.
(a) Tube Dilution Technique (Minimum Inhibitory Concentration – MIC)
The Tube Dilution technique is a quantitative method that determines the lowest concentration of an antibiotic that inhibits the visible growth of a microorganism. This value is known as the Minimum Inhibitory Concentration (MIC).
Step-by-Step Procedure:
- Prepare Serial Dilutions: A series of tubes are prepared, each containing a liquid culture medium (broth) and a decreasing concentration of the antibiotic. Typically, a twofold serial dilution is used (e.g., 32 µg/mL, 16 µg/mL, 8 µg/mL, 4 µg/mL, 2 µg/mL, 1 µg/mL, 0.5 µg/mL, etc.).
- Add Standardized Bacterial Inoculum: A standardized suspension of the test bacteria (usually adjusted to a specific turbidity, like 0.5 McFarland standard) is added to each tube containing the antibiotic dilution and broth. This ensures a consistent number of bacteria are tested at each antibiotic concentration.
- Include Controls:
- Growth Control: A tube containing only broth and the standardized bacterial inoculum (no antibiotic) is included to confirm that the organisms are viable and capable of growth under the test conditions. Visible turbidity is expected.
- Sterility Control: A tube containing only broth (no bacteria) is included to check for contamination of the medium. No turbidity is expected.
- (Optional) Antibiotic Control: A tube containing the highest concentration of antibiotic and broth (no bacteria) can be included to ensure the antibiotic itself is not causing turbidity.
- Incubation: All tubes are incubated under appropriate conditions (typically 35-37°C for 18-24 hours in ambient air) to allow bacterial growth.
- Observation and Interpretation: After incubation, the tubes are examined for visible turbidity (cloudiness), which indicates bacterial growth. The MIC is the lowest concentration of the antibiotic in the series of dilutions that shows no visible turbidity. The tube immediately following the MIC tube (with the next higher concentration) should also show no turbidity, and the tube with the next lower concentration should show visible growth (as should the growth control).
The MIC value is then compared to established clinical breakpoints (defined by bodies like the Clinical and Laboratory Standards Institute – CLSI) to classify the organism as susceptible, intermediate, or resistant to that specific antibiotic. A lower MIC value generally indicates greater susceptibility.
(b) Paper Diffusion Technique (Kirby-Bauer Method)
The Paper Diffusion technique, most commonly performed as the Kirby-Bauer disk diffusion test, is a semi-quantitative method that assesses the susceptibility of a bacterial isolate to several antibiotics simultaneously on a single agar plate. It is based on the principle that an antibiotic diffuses from a paper disk into the agar, creating a concentration gradient.
Step-by-Step Procedure:
- Prepare Agar Plate: A standardized Mueller-Hinton agar plate is used. This medium is suitable for the growth of most non-fastidious bacteria and does not inhibit antibiotic diffusion. The depth of the agar is critical for obtaining reproducible results.
- Prepare Standardized Bacterial Inoculum: A pure culture of the test bacteria is used to prepare a suspension in saline or broth, adjusted to a specific turbidity standard (typically 0.5 McFarland, which corresponds to approximately 1.5 x 10⁸ colony-forming units/mL). This ensures a consistent inoculum density.
- Inoculate Plate: The standardized bacterial suspension is evenly swabbed over the entire surface of the Mueller-Hinton agar plate using a sterile cotton swab, ensuring confluent growth (a lawn of bacteria) after incubation. The plate is allowed to dry for a few minutes (usually 3-5 minutes) with the lid slightly ajar to absorb excess moisture.
- Place Antibiotic Disks: Paper disks impregnated with specific concentrations of different antibiotics are aseptically placed onto the inoculated agar surface, spaced far enough apart (at least 24 mm center-to-center) to prevent overlapping zones of inhibition.
- Incubation: The plate is inverted (to prevent condensation from dripping onto the surface) and incubated under appropriate conditions (typically 35-37°C for 16-18 hours in ambient air). During incubation, the antibiotic diffuses radially outwards from the disk into the agar.
- Measure Zones of Inhibition: After incubation, the plate is examined. If the bacteria are susceptible to an antibiotic, a clear area (zone of inhibition) will appear around the disk where bacterial growth has been inhibited. If the bacteria are resistant, they will grow right up to the edge of the disk (or the zone will be very small). The diameter of the zone of inhibition (including the disk diameter) is measured in millimeters using a ruler or caliper.
The measured zone diameters are then compared to standardized interpretive tables (again, typically from CLSI) specific to the organism and antibiotic being tested. These tables correlate zone diameters with MIC ranges and classify the organism as susceptible (S), intermediate (I), or resistant (R). Larger zones of inhibition generally correlate with lower MIC values and thus greater susceptibility, although the relationship is not strictly linear and requires consulting the standard tables.

