In the complex environment of clinical medicine, the strategic use of tubes and drains is fundamental for diagnosing conditions, managing symptoms, administering therapies, and facilitating recovery. These medical devices serve a variety of critical functions, from decompressing bodily cavities and delivering nutrition to draining unwanted fluids and promoting healing. Proficiency in understanding the types, indications, contraindications, and proper techniques for insertion and removal is paramount for healthcare professionals to ensure patient safety and optimal outcomes. This guide provides an overview of some commonly used tubes and drains in clinical practice.
1. Nasogastric (NG) Tubes
A nasogastric tube is a flexible tube passed through the nostril, down the esophagus, and into the stomach or upper small intestine. They are versatile tools used for various purposes.
Indications:
- Gastric decompression: To remove air or fluid from the stomach and relieve distension, often in cases of bowel obstruction, paralytic ileus, or post-surgically.
- Nutrient administration: To deliver enteral nutrition (tube feeding) when a patient is unable to swallow adequately but has a functional gastrointestinal tract.
- Medication administration: To give oral medications to patients unable to take them by mouth.
- Gastric lavage: To wash out the stomach in cases of poisoning or overdose.
- Sampling gastric contents: For diagnostic analysis.
- Bowel rest: To keep the stomach empty in certain gastrointestinal conditions.
Contraindications:
- Severe facial or head trauma: Particularly if involving suspected cribriform plate fracture, which could lead to tube insertion into the cranial cavity.
- Esophageal strictures or atresia: Making passage of the tube difficult or impossible.
- Recent esophageal or gastric surgery: May disrupt surgical anastomoses.
- Esophageal varices: Increased risk of bleeding.
- Basilar skull fracture (suspected): Requires extreme caution due to risk of intracranial insertion.
Technique of Insertion:
- Preparation: Explain the procedure to the patient, obtain consent, gather equipment (NG tube of appropriate size, lubricant, syringe, water, tape, stethoscope, pH indicator strips, emesis basin, towel, gloves, protective eyewear). Position the patient sitting upright (if possible) with the neck slightly flexed.
- Measure the tube: Measure the length required from the tip of the nose to the earlobe and then down to the xiphoid process. Mark this distance on the tube.
- Lubricate the tube: Lubricate the tip of the tube generously with a water-soluble lubricant.
- Insert the tube: Ask the patient to slightly extend their neck. Gently insert the lubricated tip into one nostril, directing towards the back of the throat.
- Advance the tube: Once the tube reaches the nasopharynx, ask the patient to tuck their chin to their chest and swallow sips of water (if permitted) or dry swallow. Advance the tube with each swallow. This helps guide the tube down the esophagus rather than into the trachea.
- Confirm placement: This is a critical step.
- Initial methods: Inject 10-20 ml of air into the tube with a syringe while auscultating over the epigastrium for a characteristic “whoosh” sound (though this is not definitive). Aspirate gastric contents and check the pH (gastric aspirate is typically acidic, pH < 5.5).
- Gold standard: Obtain a chest X-ray to definitively confirm the tube tip is in the stomach. Relying solely on auscultation or pH is insufficient, especially before administering feed or medication.
- Secure the tube: Once placement is confirmed, secure the tube to the patient’s nose with hypoallergenic tape, taking care to avoid pressure on the nostril. Secure the tube to the patient’s gown to prevent accidental dislodgement.
Technique of Removal:
- Preparation: Explain the procedure to the patient, gather equipment (towel, emesis basin, gloves). Position the patient sitting upright.
- Flush the tube (optional but recommended): Flush the tube with a small amount of air or saline to clear contents and prevent aspiration during removal.
- Remove tape: Carefully remove the tape securing the tube to the nose and gown.
- Withdraw the tube: Ask the patient to take a deep breath and hold it. Gently and steadily withdraw the tube in one smooth motion. Holding the breath helps close the epiglottis and reduces the risk of aspiration.
- Post-removal care: Provide oral hygiene and assess the patient’s comfort.
2. T-Tubes (Biliary)
A T-tube is a surgical drain placed in the common bile duct (CBD) after surgical exploration or surgery involving the CBD, such as a choledocholithotomy (removal of stones from the CBD). It is shaped like the letter ‘T’, with the crossbar resting within the CBD and the stem exiting through the abdominal wall.
Indications:
- Decompression of the biliary tree: To relieve pressure and prevent bile leakage from the surgical site after CBD surgery.
- Drainage of bile: Allows bile to drain externally while swelling subsides and the CBD heals.
- Providing access for cholangiography: Allows contrast injection to visualize the biliary tree post-operatively to check for residual stones or strictures before removing the tube.
Contraindications:
- Not typically relevant for insertion as insertion is part of a necessary surgical procedure on the CBD.
- Contraindications for removal would include persistent obstruction, ongoing bile leak (unless managed via the T-tube), or insufficient maturation of the tract around the tube.
Complications:
- Infection: Cholangitis (infection of the bile ducts) or wound infection at the exit site.
- Bile leak: After removal, if the tract is not matured or if there is distal obstruction.
- T-tube displacement or dislodgement: Can lead to significant bile leakage and infection.
- Obstruction of the T-tube: Can cause jaundice and cholangitis.
- Bleeding: At the insertion site or within the biliary tree.
- Pancreatitis: Due to manipulations near the pancreatic duct.
- Stricture formation: Long-term presence can potentially lead to stricture at the insertion site in the CBD or at the skin exit site.
Technique of Insertion:
T-tube insertion is a surgical procedure performed in the operating room. The surgeon makes an incision in the common bile duct, removes stones or performs other necessary procedures, and then inserts the T-tube. One limb of the ‘T’ goes upstream (towards the liver), the other limb goes downstream (towards the duodenum), and the stem is brought out through a separate stab incision in the abdominal wall, secured to the skin.
Technique of Removal:
T-tubes are typically removed weeks after surgery (usually 2-6 weeks) after a tract has formed around the tube and patency of the CBD has been confirmed (often by T-tube cholangiogram).
- Preparation: Explain the procedure, obtain consent, gather equipment (suture removal kit, dressing supplies, gloves). Ensure the patient has been on a low-fat diet for some time prior to removal to reduce bile flow. The tube is often clamped for 24-48 hours prior to removal to ensure the patient tolerates the internal flow of bile.
- Remove securing sutures: Carefully cut and remove any sutures holding the T-tube to the skin.
- Withdraw the tube: Ask the patient to exhale or hold their breath (techniques vary, but often gentle instruction is given). Gently and steadily pull the tube out with smooth traction.
- Apply dressing: Apply a sterile dressing to the exit site. Expect some serosanguinous or bile-stained drainage from the site for a few days. Monitor for signs of infection or excessive bile leakage.
3. Foley Catheters (Indwelling Urinary Catheters)
A Foley catheter is a flexible tube inserted through the urethra and into the bladder to drain urine. It has a small balloon at the tip that is inflated with sterile water to hold it in place within the bladder.
Indications:
- Urinary Retention: To relieve bladder distension caused by outflow obstruction (e.g., BPH, strictures, blood clots) or impaired bladder function.
- Accurate Intake and Output Monitoring: In critically ill or unstable patients.
- Surgical Procedures: To keep the bladder empty during lengthy surgeries or procedures involving the pelvis or urinary tract.
- Neurogenic Bladder: For patients with impaired bladder emptying due to neurological conditions (e.g., spinal cord injury, stroke).
- Instillation of Medications: Into the bladder (e.g., chemotherapy agents).
- End-of-life Care: For comfort or convenience.
- Management of severe urinary incontinence when other measures have failed and skin integrity is compromised.
Contraindications:
- Trauma to the urethra: Suspected or confirmed urethral injury (e.g., pelvic trauma, blood at the meatus, perineal hematoma). A retrograde urethrogram should be performed before inserting a catheter.
- Presence of an artificial sphincter: Requires specialist guidance.
- Acute prostatitis: Relative contraindication due to risk of exacerbating infection.
Complications:
- Urinary Tract Infection (UTI): The most common complication. Catheter-associated UTIs (CAUTIs) are a significant concern.
- Urethral Trauma: Can occur during insertion, leading to pain, bleeding, or stricture formation.
- Paraphimosis: In uncircumcised males if the foreskin is not replaced after cleaning/catheterization.
- Bladder Spasms: Painful contractions of the bladder muscle.
- Stone Formation: Increased risk of bladder stones with long-term use.
- Catheter Blockage: By sediment, mucus, or blood clots.
- Psychological discomfort and functional decline: Associated with long-term catheter use.
Technique of Insertion (Sterile Procedure):
- Preparation: Explain the procedure, obtain consent, gather equipment (sterile catheterization kit including Foley catheter of appropriate size, sterile gloves, sterile drapes, antiseptic solution, lubricant, sterile water for balloon inflation, syringe, collection bag). Ensure adequate lighting. Position the patient appropriately (female: supine with knees flexed, hips abducted; male: supine with legs extended). Perform hand hygiene and don sterile gloves.
- Prepare the field: Open the sterile kit, arrange supplies, attach the catheter to the drainage bag tubing. Apply sterile drapes to create a sterile field.
- Prepare the patient: Cleanse the urethral meatus thoroughly with antiseptic solution (female: separate labia, cleanse front to back; male: retract foreskin if uncircumcised, cleanse glans with circular motion).
- Lubricate the catheter: Apply sterile lubricant generously to the tip and distal portion of the catheter. Consider instilling lidocaine jelly into the male urethra for lubrication and anesthesia (requires separate sterile application).
- Insert the catheter:
- Female: Gently insert the catheter into the urethral meatus, advancing until urine flows (typically 2-3 inches). Advance another 1-2 inches to ensure the balloon is well within the bladder.
- Male: Apply gentle traction to the penis, perpendicular to the body. Gently insert the catheter, advancing until resistance is met at the external sphincter, then apply gentle, steady pressure while the patient relaxes their sphincter (often by asking them to bear down slightly) until urine flows (typically 6-8 inches). Advance another 1-2 inches.
- Inflate the balloon: Once urine flow is established, gently inflate the balloon with the recommended volume of sterile water (usually 10 ml) using the syringe. If the patient experiences significant pain during inflation, deflate the balloon and advance the catheter further, then reinflate.
- Withdraw slightly: Gently pull back on the catheter until resistance is felt, confirming the balloon is seated at the bladder neck.
- Secure the catheter: Secure the catheter tubing to the patient’s thigh (female) or abdomen (male) with tape or a securement device to prevent traction on the urethra. Ensure the drainage bag is positioned below bladder level.
- Post-procedure: Ensure the foreskin is returned to its natural position in uncircumcised males. Document catheter size, inflated balloon volume, amount, color, and clarity of urine, and patient tolerance.
Technique of Removal:
- Preparation: Explain the procedure, gather equipment (syringe, towel, gloves). Perform hand hygiene and don gloves.
- Deflate the balloon: Insert the tip of the syringe into the balloon port and allow the sterile water to drain out passively. Ensure the entire volume that was instilled is removed. Never cut the catheter tubing to deflate the balloon.
- Withdraw the catheter: Ask the patient to take a deep breath and exhale. Gently withdraw the catheter smoothly.
- Post-removal care: Monitor the patient for voiding within a few hours of removal. Note the time of the first void and monitor for signs of urinary retention.
4. Chest Tubes (Thoracostomy Tubes)
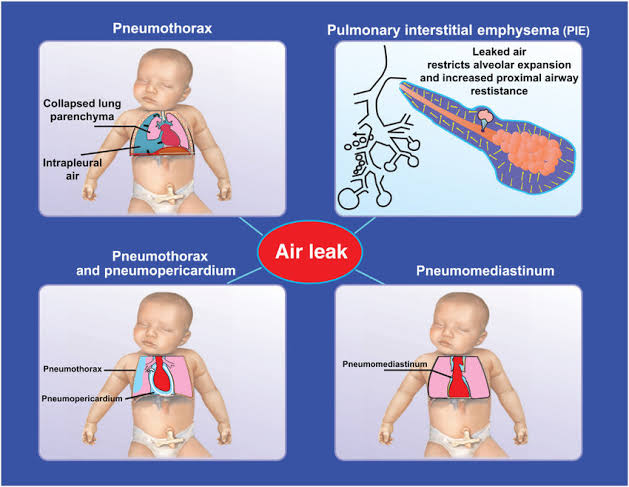
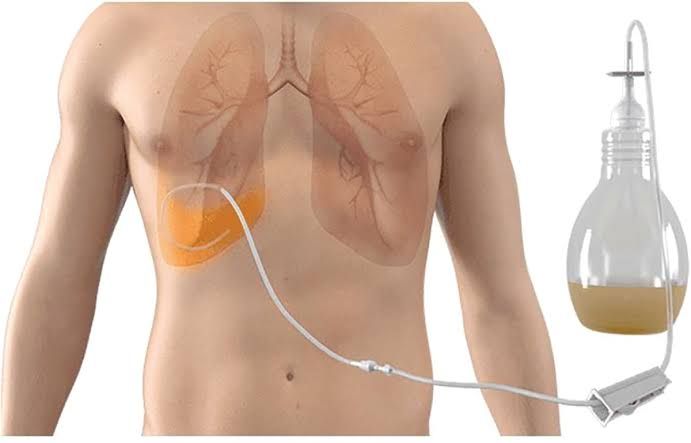
Chest tubes are flexible tubes inserted into the pleural space (the space between the lungs and the chest wall) or the mediastinum (the space between the lungs) to remove air, fluid (such as blood, pus, or pleural effusion), or pus, allowing the underlying lung to re-expand.
Types:
- Size: Vary widely depending on the indication (small bore vs. large bore). Small-bore (10-14 Fr) are often used for pneumothorax or simple effusions. Large-bore (20-40 Fr) are used for hemothorax, empyema, or chylothorax.
- Material: Made of PVC, silicone, or other polymers.
- Configuration: Single lumen, double lumen. Some have multiple drainage ports.
Indications:
- Absolute Indications:
- Pneumothorax: Significant spontaneous pneumothorax (>20%), tension pneumothorax (requires immediate needle decompression followed by chest tube), iatrogenic pneumothorax (e.g., after central line insertion or biopsy), traumatic pneumothorax.
- Hemothorax: Presence of blood in the pleural space, especially if significant (>200-300 ml).
- Empyema: Collection of pus in the pleural space.
- Chylothorax: Accumulation of lymphatic fluid in the pleural space.
- Relative Indications:
- Large malignant pleural effusion: For symptom control (dyspnea) or pleurodesis (instillation of agents to obliterate the pleural space).
- Post-operative placement: After thoracic or cardiac surgery to drain fluid, blood, and air and facilitate lung re-expansion.
Procedure of Insertion (Thoracostomy):
This is a sterile, potentially complex procedure requiring training, typically performed by a physician.
- Preparation: Explain the procedure, obtain consent, assess the patient (including coagulation status). Gather equipment (thoracostomy kit containing chest tube of appropriate size, scalpel, clamps, sutures, sterile gloves, gowns, drapes, antiseptic solution, local anesthetic, needles, syringe, drainage system (e.g., Pleur-Evac), sterile water or saline, tape). Position the patient appropriately (often semi-recumbent with the arm on the affected side raised above the head; for pneumothorax, typically in the 4th/5th intercostal space anterior or mid-axillary line; for fluid, often in the 5th-7th intercostal space mid- or posterior-axillary line). Identify the landmarks and the insertion site. Ultrasound guidance is increasingly used.
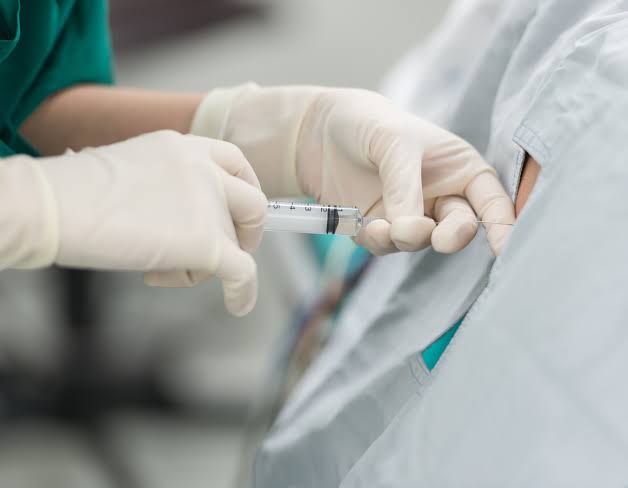
- Sterile Field and Anesthesia: Prepare the skin with antiseptic solution and drape the area to create a sterile field. Infiltrate the skin, subcutaneous tissue, rib periosteum, and parietal pleura with local anesthetic.
- Incision: Make a small skin incision (typically 1.5-2 cm) parallel to the rib below the chosen intercostal space.
- Blunt Dissection: Using a clamp (like a Kelly clamp), perform blunt dissection down to the parietal pleura, staying just above the superior border of the rib to avoid the neurovascular bundle which runs along the inferior border.
- Entry into Pleural Space: Puncture the parietal pleura with the clamp or scalpel tip. A rush of air or fluid confirms entry.
- Tube Insertion: Grasp the tip of the chest tube with the clamp and gently guide it through the tract and into the pleural space. Direct it appropriately (anteriorly/apically for air, posteriorly/basally for fluid).
- Advance the Tube: Use fingers (finger sweep) or the clamp to ensure the tract is open and guide the tube. Advance the tube until the last drainage hole is well within the pleural cavity.
- Connect to Drainage System: Immediately connect the distal end of the chest tube to the sterile underwater seal drainage system. Observe for expected fluctuations (tidaling) or air bubbles indicating air leak.
- Secure the Tube: Secure the tube to the skin using sutures and apply an occlusive dressing reinforced with tape.
- Confirm Placement: Obtain a chest X-ray immediately after insertion to confirm the tube’s position and assess lung re-expansion.
Procedure of Removal:
Chest tubes are removed when their purpose is achieved (e.g., pneumothorax resolved, drainage is minimal).
- Preparation: Explain the procedure, obtain consent, assess the patient (chest X-ray confirmation of resolution/minimal drainage, no air leak). Gather equipment (suture removal kit, sterile petroleum jelly gauze, sterile gauze pads, wide occlusive tape, sterile gloves, gowns). The patient may be premedicated for pain.
- Patient Positioning: Position the patient comfortably.
- Preparation: Perform hand hygiene and don sterile gloves and gown. Remove the dressing and sutures securing the tube.
- Instruct the Patient: Ask the patient to perform the Valsalva maneuver (exhale forcibly while blocking nose/mouth) or take a deep breath and hold it during tube removal. This increases intrathoracic pressure and reduces the risk of air entering the pleural space as the tube is withdrawn. Another technique is to remove on end-expiration. Follow local protocols.
- Remove the Tube: While the patient performs the instructed maneuver, gently and steadily remove the tube in one smooth motion. Simultaneously, cover the insertion site immediately with a sterile petroleum jelly gauze and then sterile gauze pads.
- Secure the Dressing: Apply wide occlusive tape firmly over the gauze to ensure an airtight seal.
- Post-removal Care: Monitor the patient for signs of a recurrent pneumothorax (dyspnea, chest pain, decreased breath sounds). Obtain a chest X-ray hours after removal to check for re-accumulation.
Complications:
- Acute Complications (during or shortly after insertion):
- Pain: Common due to irritation of the pleura and chest wall.
- Bleeding: From the insertion site or injury to intercostal vessels.
- Organ Injury: Accidental puncture of lung, diaphragm, spleen, liver, heart, or major vessels.
- Subcutaneous Emphysema: Air in the tissues under the skin.
- Infection: Cellulitis at the site, empyema.
- Tube Malposition or Kinking: Ineffective drainage.
- Re-expansion Pulmonary Edema: Rare but serious complication after rapid re-expansion of a collapsed lung.
- Late Complications (days or weeks after insertion or removal):
- Infection: Empyema or wound infection.
- Persistent Air Leak: Can prolong hospitalization.
- Blocked Tube: Requires flushing or replacement.
- Frozen Shoulder: Limitation of shoulder movement on the affected side.
- Post-thoracostomy Pain Syndrome: Chronic pain at the insertion site.
- Recurrent Pneumothorax or Effusion: After tube removal.
- Bronchopleural Fistula: Persistent communication between an airway and the pleural space, leading to continued air leak.
Conclusion
Tubes and drains are indispensable tools in modern clinical practice, each designed for specific purposes within different organ systems. While offering significant therapeutic and diagnostic benefits, their use is associated with potential risks and complications. Mastery of the correct indications, contraindications, and meticulous insertion and removal techniques, combined with vigilant patient monitoring and adherence to sterile principles, is essential for all healthcare professionals utilizing these devices. Ongoing education and adherence to institutional protocols are crucial for maximizing patient safety and optimizing outcomes.

