Blood culture is a critical diagnostic tool for identifying bloodstream infections (BSI), a life-threatening condition. The accuracy of a blood culture result hinges significantly on the proper application of aseptic technique during collection. Contamination can lead to false positives, unnecessary treatment, increased healthcare costs, and delayed diagnosis of the true pathogen.
The Paramount Importance of Aseptic Technique
Aseptic technique refers to a set of practices designed to prevent the transfer of microorganisms from the environment, particularly the patient’s skin, into the blood sample. For blood culture, this means preventing skin flora from contaminating the specimen. Skin commensals, such as coagulase-negative staphylococci, Corynebacterium species, and Propionibacterium acnes, are common contaminants. Distinguishing a true pathogen from a contaminant relies heavily on clinical context and sometimes multiple positive cultures, but minimizing contamination in the first place is the gold standard.
Following a rigorous step-by-step process is crucial for successful and uncontaminated blood culture collection. This procedure should be standardized across healthcare settings.
Step 1: Preparation – Gather Equipment and Identify Patient
- Gather Supplies: Assemble all necessary equipment before approaching the patient. This typically includes recommended blood culture bottle set(s) (aerobic and anaerobic), appropriate disinfectant wipes (specific types discussed below), sterile gloves, tourniquet, needles (butterfly set or straight needles with appropriate holder), sterile gauze pads, adhesive bandage or tape, and a sharps disposal container. Check expiration dates on all sterile supplies and culture bottles.
- Patient Identification: Verify the patient’s identity using at least two identifiers (e.g., name and date of birth) according to institutional policy. Explain the procedure to the patient, obtain verbal consent, and answer any questions. Explain why blood cultures are needed and the importance of remaining still during the procedure.
Step 2: Select the Venipuncture Site
- Preferred Site: The antecubital fossa veins (median cubital, cephalic, basilic) are typically the preferred sites due to their accessibility and size.
- Avoidance: Avoid collecting blood from sites with existing skin infections, rashes, scars, hematomas, or areas proximal to an intravenous (IV) line insertion site. If drawing from an arm with an IV, choose a site distal to the IV line or, preferably, the opposite arm. Never draw blood culture specimens from an indwelling IV catheter or central line unless specifically ordered by the physician (e.g., for suspected catheter-related bloodstream infection) and following a specific institutional protocol, as this carries a higher risk of contamination or difficulty interpreting results.
- Palpation: Locate the vein by palpation before the skin preparation steps. If palpation is necessary after the antiseptic has been applied and dried, sterile gloves must be worn, and palpation must be performed through the sterile dressing or without touching the prepared skin area.
Step 3: Perform Meticulous Skin Preparation
This is the most critical step in preventing contamination. A multi-step process is required.
- Initial Cleaning: Cleanse the venipuncture site vigorously with an alcohol pad (70% isopropyl alcohol). This removes surface dirt and grease. Work outwards from the center of the site.
- Antiseptic Application: Apply a recommended skin antiseptic. Common options include:
- Chlorhexidine Gluconate (CHG) > 0.5% with 70% Isopropyl Alcohol: This is often the preferred agent due to its rapid action and persistent antimicrobial activity. Apply with friction using the provided applicator (e.g., swab sticks or sponge), covering an area 2-3 inches in diameter around the intended puncture site.
- Povidone-Iodine (10% tincture): Apply with friction, covering the same area.
- Iodine Swabsticks (2% Tincture of Iodine followed by 70% Isopropyl Alcohol): Use iodine first, applying in a circular motion outwards, followed by alcohol in the same manner.
- Contact/Drying Time: Crucially, allow the antiseptic to remain on the skin for the manufacturer’s recommended contact time to be effective. For povidone-iodine, this is typically at least 1.5 to 2 minutes (ideally dried); for CHG/alcohol combinations, it’s often 30 seconds of contact time, followed by complete air drying (which is essential for the alcohol component). Do not blot or wipe off the antiseptic.
- Post-Prep: Once the antiseptic is applied and dry, the site is sterile. Do not touch the site again. If palpation is necessary after preparation, it must be done using sterile gloves or over a sterile barrier.
Step 4: Perform Venipuncture and Blood Collection
- Apply Tourniquet: Reapply the tourniquet proximal to the prepared site, ensuring the antiseptic is completely dry.
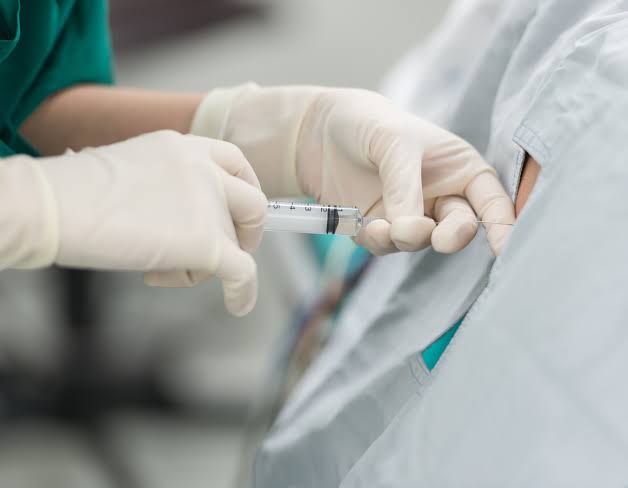
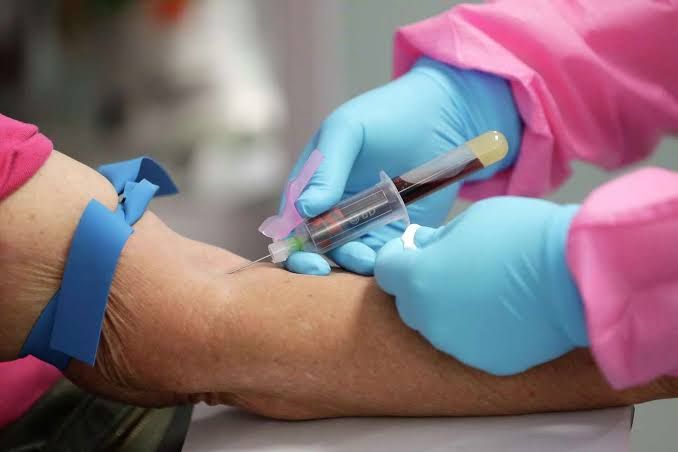
- Perform Venipuncture: Using a sterile needle (butterfly or straight needle) and holder, perform the venipuncture smoothly. Avoid excessive probing.
- Inoculate Bottles: Inoculate the blood culture bottles at the bedside immediately after collection.
- Critical Aseptic Step: Before inserting the needle into the bottle, clean the rubber septum (top) of each blood culture bottle with a fresh alcohol pad or disinfectant wipe and allow it to dry.
- Order of Draw: If using a butterfly system, inoculate the aerobic bottle first. The tubing of a butterfly set contains a small amount of air; drawing into the aerobic bottle first allows this air to enter the bottle designed to handle oxygen. If an anaerobic bottle were filled first, this air could compromise the anaerobic environment. If using a straight needle/syringe, the order of draw (aerobic vs. anaerobic) is less critical regarding air but should still be consistent with lab protocol, often anaerobic first to prevent potential air exposure during transfer.
- Fill Volume: Collect the recommended amount of blood for each bottle as specified by the bottle manufacturer or laboratory protocol. Optimal fill volume is critical for microbial recovery because it ensures the correct blood-to-broth ratio, which dilutes inhibitory substances in the blood (like antibiotics or host defense factors) and provides sufficient nutrients while preventing oxygen from being fully consumed too quickly in the anaerobic bottle. Undermixing or overmixing doesn’t impact volume but mixing thoroughly after inoculation is required. For adults, 10 mL per bottle (20 mL per set) is typical; for pediatrics, the volume is much smaller and weight-based.
- Post-Venipuncture: Release the tourniquet, withdraw the needle, apply pressure to the site with sterile gauze until bleeding stops, and apply an adhesive bandage.
Step 5: Label and Transport Specimens
- Labeling: Label the blood culture bottles immediately at the patient’s bedside AFTER collection. Include patient identification information (name, date of birth, medical record number), date and time of collection, and the site of collection (e.g., Left Antecubital). Do not place labels over the bottle barcode or the fill volume line.
- Transport: Transport the blood cultures to the laboratory promptly at room temperature unless otherwise specified by the lab. Avoid refrigeration unless specifically instructed, as some common pathogens are susceptible to cold.
Types of Blood Culture Systems
Once collected, blood cultures are processed using either manual or, more commonly today, automated systems.
- Manual Systems: Historically, blood cultures were processed manually. This involved inoculating broth bottles and visually inspecting them daily for signs of growth (turbidity, hemolysis, gas production). If growth was suspected or after a fixed incubation period, subcultures were performed onto solid media. This method is labor-intensive, subjective, and less sensitive than automated systems.
- Automated Systems: The vast majority of clinical laboratories use automated blood culture systems (e.g., BD BACTEC™, bioMérieux BacT/ALERT®, Thermo Scientific VersaTREK®). These systems continuously monitor the bottles for indicators of microbial growth. Bottles are placed in specialized incubators within the instrument, and a sensor in the instrument or the bottle base detects metabolic changes.
- Detection Mechanism: Most automated systems detect the production of carbon dioxide (CO2) as microorganisms metabolize nutrients in the broth. As CO2 increases, it changes the pH or affects a colorimetric or fluorescent sensor within the bottle or at the base, triggering a positive signal. Other systems may detect pressure changes or other parameters.
- Workflow: When a positive signal is detected, the instrument alerts the laboratory staff. The bottle is then removed, and gram stains and subcultures onto appropriate agar media are performed to identify the organism. Negative bottles are typically incubated for a standard period (usually 5-7 days) before being discarded. Automated systems significantly reduce the time to detection compared to manual methods.
Types and Constituents of Blood Culture Bottles
Blood culture bottles are specifically formulated to support the growth of a wide variety of potential bloodstream pathogens while counteracting inhibitory substances.
- Bottle Types:
- Aerobic: Contains broth media designed to support the growth of microorganisms that require oxygen. The bottle head space contains air (oxygen).
- Anaerobic: Contains broth media and is designed to support the growth of microorganisms that grow in the absence of oxygen. The head space is often filled with a mixture of gases like CO2 and nitrogen, and the media contains reducing agents.
- Pediatric: Designed for smaller blood volumes collected from infants and children (typically 0.5 mL to 4 mL total volume). Contains broth suitable for pediatric pathogens and often has a lower fill line.
- Resin or Activated Charcoal Bottles: These bottles contain substances (polymeric absorbent beads or activated charcoal) that adsorb antibiotics and other inhibitory compounds (like complement or fatty acids) present in the patient’s blood. This is particularly useful for patients receiving antimicrobial therapy, as it can improve the recovery of bacteria and fungi. These are often paired with standard bottles for comparison.
- Mycology/Mycobacteriology (e.g., Isolator™ tubes, specific broth bottles for automated systems): Specialized systems or broth formulations are used for isolation of fungi and mycobacteria from blood, which may require different media or processing techniques (like lysis-centrifugation) and longer incubation times.
- Key Constituents:
- Culture Media (Broth): Provides essential nutrients (peptones, carbohydrates, vitamins, trace elements) required for microbial growth. Formulations vary slightly between manufacturers and bottle types to optimize recovery of different organisms.
- Anticoagulant: Prevents the blood from clotting, which would trap bacteria within the clot and impede their detection. Sodium Polyanethol Sulfonate (SPS) is the most common anticoagulant used in blood culture bottles. SPS also has the beneficial properties of inhibiting phagocytosis and inactivating some components of the complement system and certain antibiotics, further enhancing microbial recovery. However, SPS can inhibit the growth of a few fastidious organisms (e.g., Neisseria, Gardnerella, Streptobacillus moniliformis, Peptostreptococcus anaerobius), although this is less common with modern formulations and the neutralizing effects of the broth media.
- Resins/Adsorbent Polymers or Activated Charcoal: As mentioned, these are included in specific bottles to neutralize or adsorb antibiotics and other inhibitory substances present in the blood.
Cultural and Incubational Environments
Once inoculated, blood culture bottles require specific conditions to facilitate microbial growth.
- Incubation Temperature: The standard incubation temperature for blood cultures is 35°C to 37°C (body temperature). This range supports the growth of most human pathogens.
- Atmospheric Conditions:
- Aerobic Bottles: Incubated in the presence of oxygen.
- Anaerobic Bottles: Incubated in an environment devoid of significant oxygen. The bottle design and gas composition in the head space maintain anaerobic conditions.
- Incubation Duration:
- Routine Cultures: Typically incubated for 5-7 days in automated systems. The instrument continuously monitors for growth, and positive signals are usually detected within 24-72 hours for common pathogens.
- Extended Incubation: For specific pathogens or clinical suspicions (e.g., endocarditis, fungal infections, HACEK group organisms – Haemophilus, Aggregatibacter, Cardiobacterium, Eikenella, Kingella, certain slow-growing bacteria), incubation may be extended to 10-14 days or longer, depending on laboratory protocol and the automated system’s capabilities. Mycology cultures often require incubation for up to 4 weeks.
- Monitoring: Automated systems continuously monitor the bottles, often every 10 minutes, providing real-time feedback on potential growth and significantly reducing the time to positive results compared to manual methods.
Conclusion
Accurate diagnosis of bloodstream infections begins with meticulous and aseptic blood culture collection. Adherence to standardized procedures for site preparation, venipuncture, and bottle inoculation is paramount to minimizing contamination and ensuring reliable results. Understanding the different types of automated systems, the varied compositions of blood culture bottles, and the specific cultural requirements further highlights the complexity and importance of this critical laboratory test. By strictly following established aseptic techniques and proper handling procedures, healthcare professionals play a vital role in providing the laboratory with high-quality specimens, enabling timely and accurate identification of pathogens and ultimately improving patient outcomes.

