Agarose gel electrophoresis is a widely used technique in molecular biology for the separation and analysis of nucleic acids, including genomic DNA and plasmid DNA. This method utilizes an agarose gel matrix to separate DNA fragments based on their size, allowing researchers to visualize and purify specific DNA samples. Below is a step-by-step guide detailing the procedures involved in performing agarose gel electrophoresis.
1. Preparation of Agarose Gel
Materials Needed:
- Agarose powder
- Electrophoresis buffer (TAE or TBE)
- Ethidium bromide (EtBr) or alternative DNA stain
- Microwave or heating source
- Gel casting tray and comb
Procedure:
- Determine Agarose Concentration: The concentration of agarose depends on the size of the DNA fragments to be separated:
- For larger fragments (e.g., > 1 kb), use 0.7% to 1% agarose.
- For smaller fragments (e.g., < 1 kb), use 1.5% to 2% agarose.
- Weigh Agarose: Measure out the appropriate amount of agarose powder based on the desired concentration and volume (e.g., for a 1% gel in 100 mL, weigh 1 g of agarose).
- Mix with Buffer: Combine the weighed agarose with a suitable electrophoresis buffer (TAE or TBE) in a microwavable flask.
- Dissolve Agarose: Heat the mixture in a microwave until completely dissolved, typically for about 1-3 minutes, swirling occasionally to prevent boiling over.
- Add Ethidium Bromide: If using EtBr for visualization, add it to a final concentration of approximately 0.5 μg/mL. Handle EtBr with care as it is a mutagen.
- Cool and Cast Gel: Allow the melted agarose solution to cool to about 50 °C before pouring it into a gel casting tray with an inserted comb. Let it solidify at room temperature or at 4 °C for faster setting.
2. Loading Samples into Wells
Materials Needed:
- DNA samples (genomic or plasmid)
- Loading dye
Procedure:
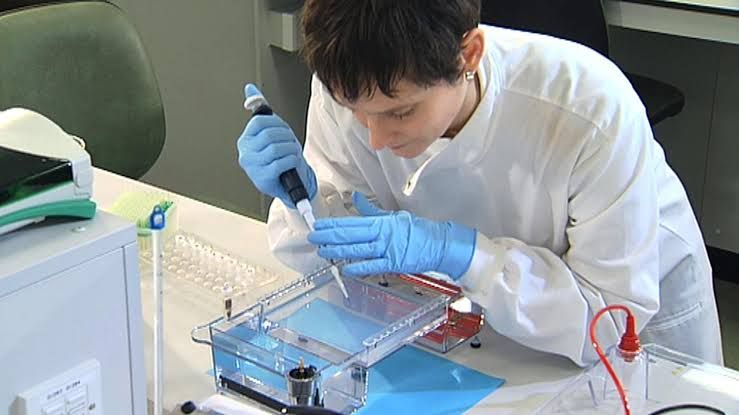
- Prepare Samples: Mix your DNA samples with loading dye, which helps visualize sample migration during electrophoresis and increases sample density so that it sinks into the wells.
- Load Samples: Once the gel has solidified, carefully remove the comb and place the gel in an electrophoresis chamber filled with running buffer (the same buffer used for preparing the gel). Using a micropipette, load your samples into the wells created by the comb.
- Include a Ladder: Always load a molecular weight ladder into one well to serve as a reference for estimating fragment sizes.
3. Running the Gel
Materials Needed:
- Power supply
Procedure:
- Connect Power Supply: Attach leads from the gel box to a power supply, ensuring correct polarity (black lead connected to cathode and red lead connected to anode).
- Set Voltage: Set an appropriate voltage (typically between 80-150 V) depending on your gel’s thickness and desired run time.
- Run Gel: Turn on the power supply and run the gel until the loading dye has migrated an appropriate distance through the gel (usually around 75-80% down).
4. Visualizing Results
Materials Needed:
- UV light source
- Gel documentation system
Procedure:
- Turn Off Power Supply: After running, turn off power and disconnect leads from power supply.
- Stain Visualization:
- If EtBr was added during preparation, visualize directly under UV light.
- If not added initially, soak in an EtBr solution post-electrophoresis before rinsing.
- Capture Images: Use a gel documentation system to take photographs of your results for analysis.
5. Analyzing Results
Procedure:
- Compare bands against your molecular weight ladder to estimate sizes of your genomic or plasmid DNA fragments.
- Identify different forms of plasmid DNA if applicable:
- Supercoiled forms migrate fastest.
- Linear forms migrate slower than supercoiled but faster than open circular forms.
- Document findings for further analysis or purification if needed.
By following these detailed steps, researchers can effectively perform agarose gel electrophoresis on genomic or plasmid DNA, allowing them to analyze fragment sizes and purify specific sequences as required.

